
We went through Gaming Mode on Steam Deck in details – we know how to setup all the options under Steam button, under Quick Access button. We also know how to buy, install and play Steam game. If we want to use full potential of our Steam Deck – we need to explore desktop mode – in Linux. Let’s start with File Manager.
We need to learn only basics in the beginning – just so we can know where our games are, and how to get to them.
This will be a longer article, but I will try to explain to you basic things about Linux, so you will find your life easier with it.
Just quick examples, of what we will do…
Proton – Steam Deck uses something called Proton – it is compatibility layer that makes possible that we start Windows games on Linux. It has special folder in our home folder – we need to learn where that is.
SD card location – Also, you will need to learn where to find your SD card – which will be very important especially if you have Steam Deck with 64GB size.
Preparations
For a start, you need to go from your Gaming Mode on Steam Deck to your Desktop Mode – here is my article on how to that in case you are not familiar.
Now, before you start to do anything serious in a Desktop Mode on Steam Deck – I would suggest that you connect your Steam Deck to keyboard and mouse – life will be easier for you. This article can be also done with only Steam Deck – but at later stages when we get to launchers, games that are not from Steam and other stuff – keyboard and mouse will be very useful.
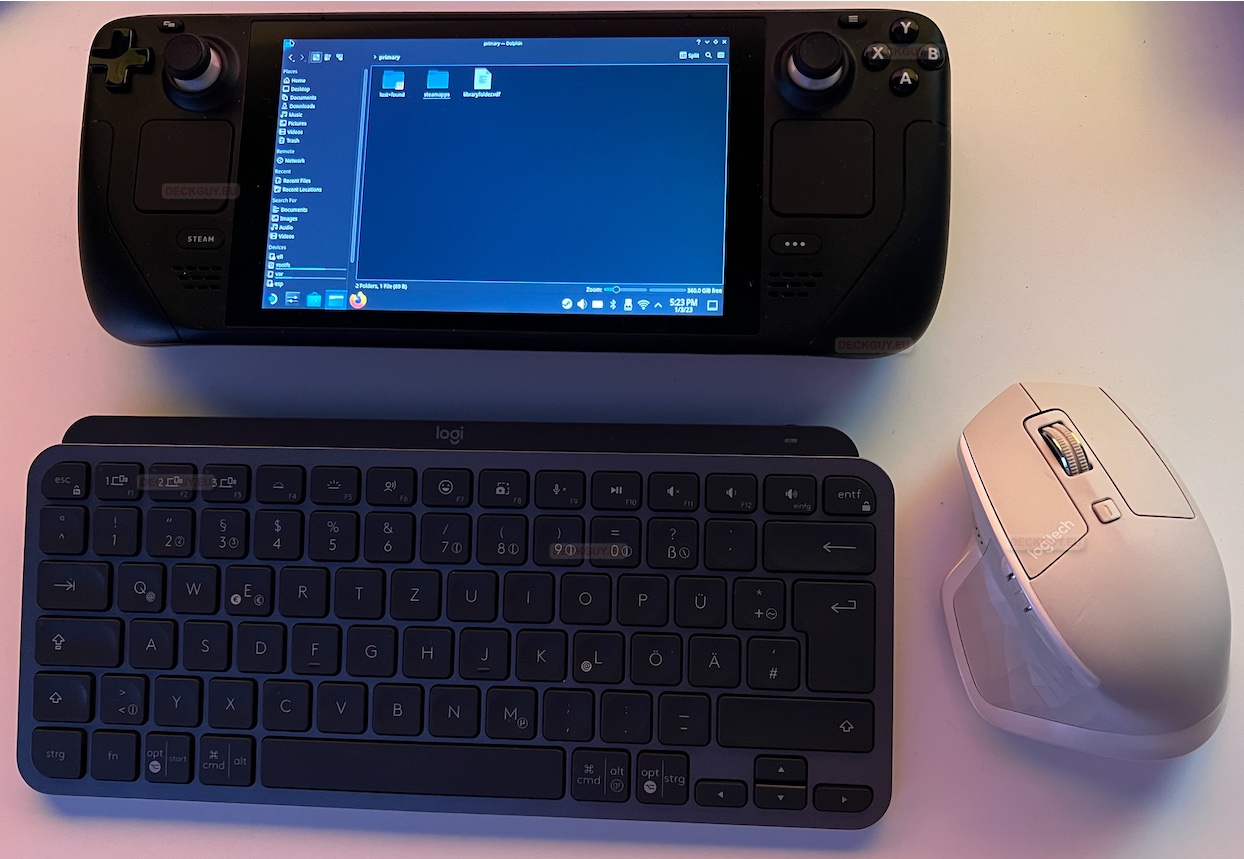
Once you are in Steam Deck Desktop mode, we can find our File Manager (icon with blue folder) on taskbar of our Steam Deck desktop mode

Congrats – we are now in File Manager on Steam Deck – it is Dolphin File Manager

Navigation / Customisation of the interface
You can customize top toolbar, left menu called Places, in main Window you can customize view, and use split view, on bottom panel you can see details about current directory, and in “hamburger” menu you can access more configurations for Dolphin and do things like create new folder, open terminal…

1.Toolbar
I don’t go crazy with options in Toolbar because screen on Steam Deck is small, and I like it not to be too cluttered. What I usually do is just change view for main window – I like Details View Mode, and I also add New Tab icon – and that is it

In the toolbar I also like Location Bar and use it often when I need to copy path

First, I want to see full path – so, right click somewhere on Location Bar and select “Show Full Path”

Also, if you double click somewhere in Location Bar you will get full path in text mode that you can copy somewhere needed. Very useful trick.

While we are still in Location bar, if you click on little > sign at the start of location bar – you will get other locations you can quickly navigate to. I find this extremely useful if I want to quickly jump somewhere down the line.

While we are here let’s learn what is important for us at this moment in terms of filesystem navigation
Folders with . (dot) at the beginning are hidden folders - .local is one example

/ - root
/ - stands for root folder - it would be something like C:\ in Win

/home/deck - home folder for our user
/home/deck - this is what everything for us will be installed and saved.
             Steam Games, Downloads...

/home/deck/.local/share/Steam/steamapps/common - Steam games are installed here

/home/deck/.local/share/Steam/steamapps/compatdata - non-Steam Games are in this path, savegames are in this path (for Steam games also), proton files for games...

/run/media/ - mount folder
/run/media - this is folder where Steam Deck will mount your MicroSD and external USB/SSD drives. Equivalent on Windows would be D:\, E:\ your USB gets when you plug it in

/run/media/mmcblk0p1 - mount folder for your MicroSD card - here are all folders and data on your MicroSD
Next up is Split icon in Toolbar – it changes View in Main Window – I use it a lot in copying procedures – folders are side by side and you can easily compare or copy something

After Split icon there is a little Search icon you can use to – search through file system.
Last, the hamburger menu – through it, you can create new folders, text files, copy, paste, filter items, open new window, new tab or Open Terminal…

What I usually do first, is – enable Show Hidden Files – it will be very confusing, typically if you are new to Linux – you will not see some folders some people mention on the internet – and the folders are nowhere to be found. Remember – I mentioned it already above – if folder has a . (dot) in front – it is hidden. One of these is crucial for our Steam games inside our Home folder – .local folder.
So, Home folder before we enable Show Hidden Files

After we enable Show Hidden Files – change is immediate

Under Show Additional Information – I like to enable Size and Modified, so I can see dates folders /files were created and their size.

Under Configure – Configure Dolphin I like to adjust few things

Under Startup I like to enable – Show full path inside location bar

On context menu – that is right click menu that appears after you click on file, folder or in blank space – I like to enable Delete option. Move to Trash is available by default, but I like to turn on and Delete option. However, be careful, if you Delete File/Folder there is no recovery from it, file or folder is forever gone
At the bottom of Context Menu there is also Download New Services… button – you can find add-ons/extensions for Dolphin there – I haven’t found anything for me, but check that out – maybe there is something for yourself. I would like add-on that mounts SMB file shares automatically, but nothing like that is available…

In the end – Trash settings – if you don’t often need things you deleted, it would be wise to set end date or limit for your trash (or both) – that way it will automatically take care of itself – configure if you see fit. I have my Delete files older than rule enabled. For Delete option and trash I didn’t do screenshot with enabled options on purpose, I’m hoping to make you read and understand these options.

That is all for configure dolphin options. One more before we leave Hamburger Menu
At the More menu, there is one option I like very much – Show Menubar with All Actions.
You may not like it, I’m old school, and I find it more practical than hamburger menus.

This is how Dolphin looks after enabling Show Menubar with All Actions – no more hamburger menu at right of the Dolphin, now all is at the top!

We are done with toolbar, and I hope that we are more familiar and comfortable with navigation through linux file system in the process.
2.Places
We will look at the places, because I like to use left sidebar, it is practical for quick navigation. Let’s see what we can do.
Remove items
Under places – I like to remove some items, because I don’t use them in my workflow.
I would like to hide Pictures folder from Places section – right click on Pictures – and click on hide. I will do that for few more items in Places sidebar

This is how my Places section looks after I Hidden Pictures, Videos and Music

While we are at the Places section, you will probably need folder called compatdata, located in /home/deck/.local/share/Steam/steamapps/compatdata, so it would be practical to put it in a Places sidebar
Navigate to the folder in main window, click and hold it, and move it to Places, or if you are not comfortable with that action on Steam Deck

Right click on folder and select Add to Places…

This should be result, you can customize Places as you wish, with things you access most.

Remote section is also one I love, you can search network and access network share here. With same logic as one above you can add your network shares in Remote section for quick access. If you were brave enough to mount your first network file share it will also be seen here.

Let’s see how to remove place…
I really don’t use Recent section – we can hide it by right clicking on item under Recent section and selecting Hide Section “Recent”. I also removed Search For section…

This is final look

Let’s just have a look at Removable Devices section
Here you will see your MicroSD card, and can access it through here. Also any Removable Devices you attach will appear here.
You see how much space is taken (with little bar below) and you can unmount MicroSD by selecting that eject sign at the end

That’s it for Places, we mastered that section also.
3. Main Window
We mostly went through it by going through toolbar and places…
This is look that I like – Details View Mode with Size and Modified Information.
I also enable Show Hidden Files and Delete on right click (as shown above).

You can use it in Split mode

and you can have it in tabbed mode

Right click is standard – Open with, change View, Properties of File, Folder, Copy, Paste, Delete (if enabled) Move to Trash…
I won’t get through Bottom Bar menu in details, since there are few things…
Zoom will change your Main Window icons size, and at the left side, there is number of files and folders.

On the right you can see size of the partition, and free/taken space

This is the end of this quick tour. We learned a few things, and now should be comfortable going to Desktop Mode and managing our file system. There is lot to learn in Linux, but this is good start to grasp basics.