
You have configured you Asus Rog Ally, you have many games and file saves on it. Smart thing to do is make an occasional backup in case something goes wrong. Also, backup would be great before you maybe decide to make clean install. In this guide we will learn how to do backup of Asus Rog Ally.
Ok, so here is a scenario – you got everything set-up, and are happily using your Rog Ally, and after some time you realize you need larger disk – but you are not willing to redo whole setup and installation again.
Second scenario is that something goes wrong – you have to send your Rog Ally to service, or your SSD goes wrong – backup is very useful thing to have in these situations. Here, I will show you how to backup and restore your Asus Rog Ally.
What you need for backup of your Asus Rog Ally?
Backup device – You will need external USB drive or MicroSD card (if you are using MicroSD card it should be large to fit all your data). In this scenario I’m using external USB drive. I have 2TB SSD drive in external case. External drive should have USB-C connector or USB-A to USB-C adapter, so you can attach drive to the Asus Rog Ally. To this drive we will store backup. The drive you do backups to, should be dedicated drive only for backups – no other data should be on it.
Word of caution – I wouldn’t recommend backing up to MicroSD in this case. It is external drive, and backup should always be done to external drive that isn’t part of the device you are backing up, but MicroSD cards don’t work great on Asus Rog Ally because of overheating problem – so I would stay away from MicroSD – because your backup can literally be burned.
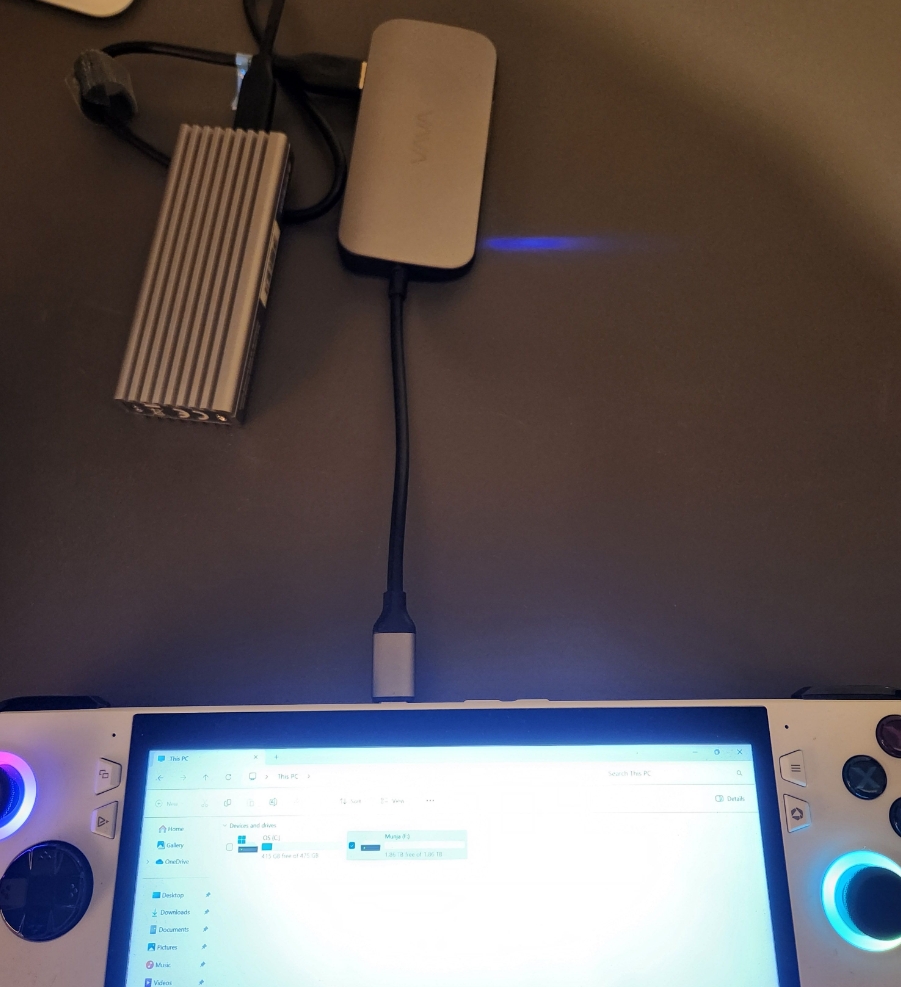
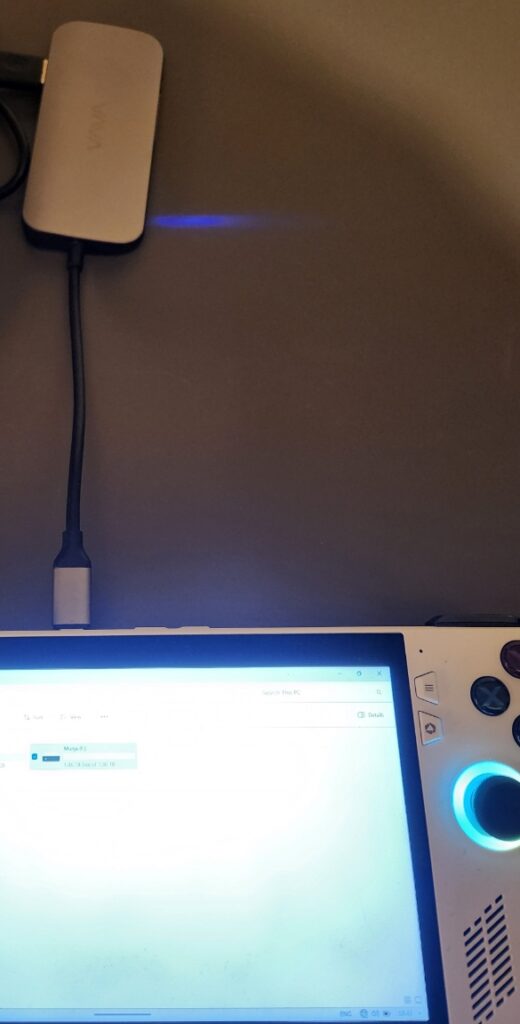
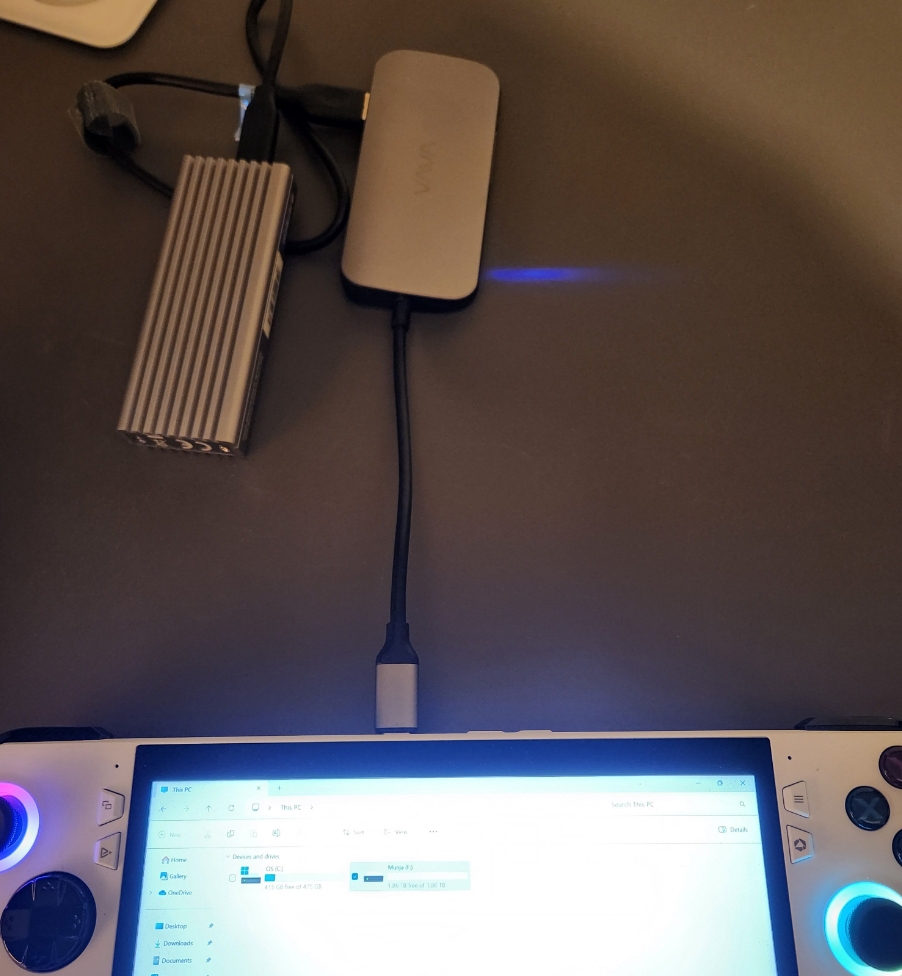
USB Hub will be handy if you plan to do restore – we are planning to do the restore, so USB Hub will be useful. At the beginning of this article I mentioned that I use VAVA va-uc006 hub – I still use this hub, and it works with Asus Rog Ally, it is capable of delivering power to Asus Rog Ally, and has multiple USB ports which will be needed in the restore process.
What you need for restore of your Asus Rog Ally?
Again, I mentioned above, USB Hub will be useful – we will have to attach external drive on which the backup is stored + USB drive with Windows installation. Keyboard and mouse (wired, or with dongle) will also make your life easier. Bluetooth keyboard and mouse won’t work during restore process – be aware of that.
Backup Procedure
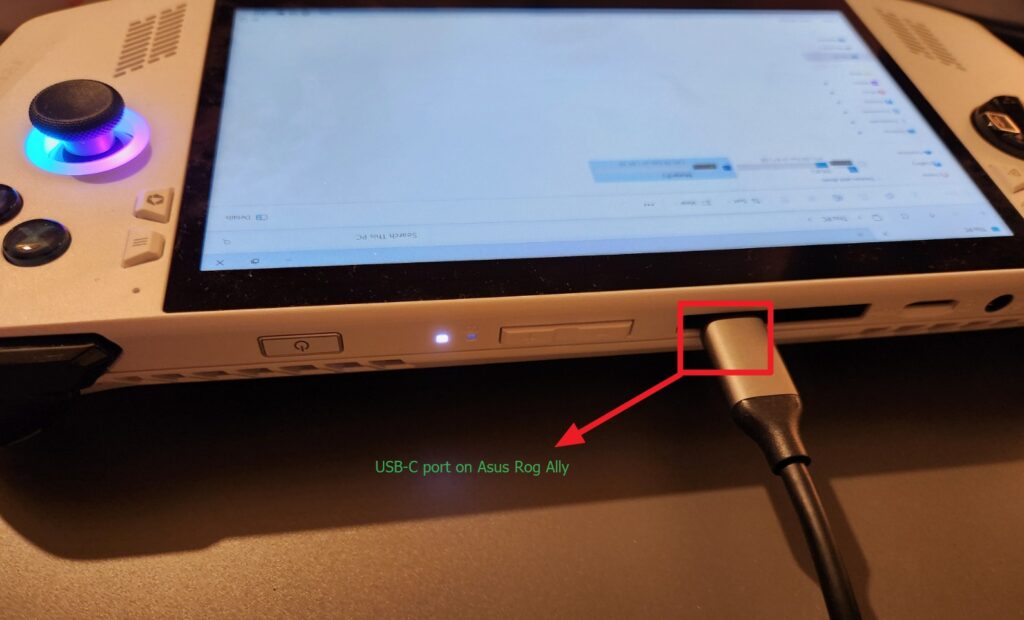
Connect external USB drive to your Asus Rog Ally. I will connect it through USB hub, but you can also connect it directly to USB port on your Asus Rog Ally
Now, that the external drive is connected, we can proceed with the backup. Make sure that your external USB drive does not have any data on it!! It should be clean drive, only meant for backup.
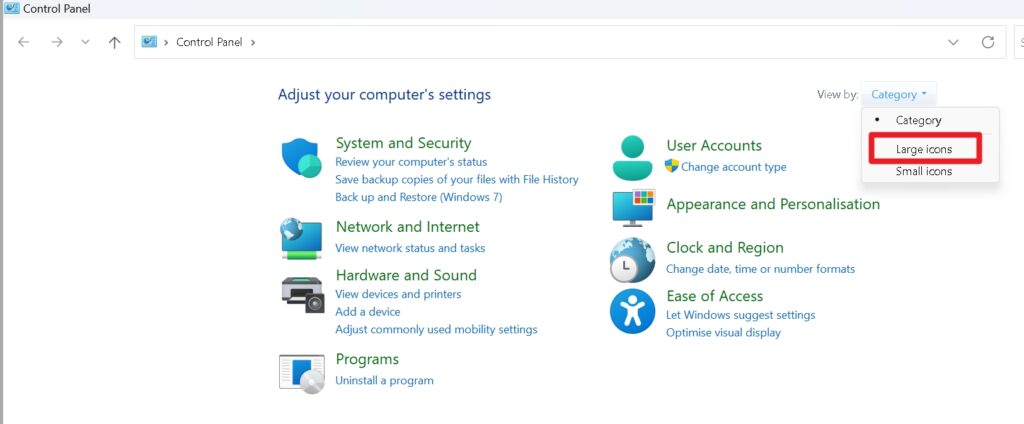
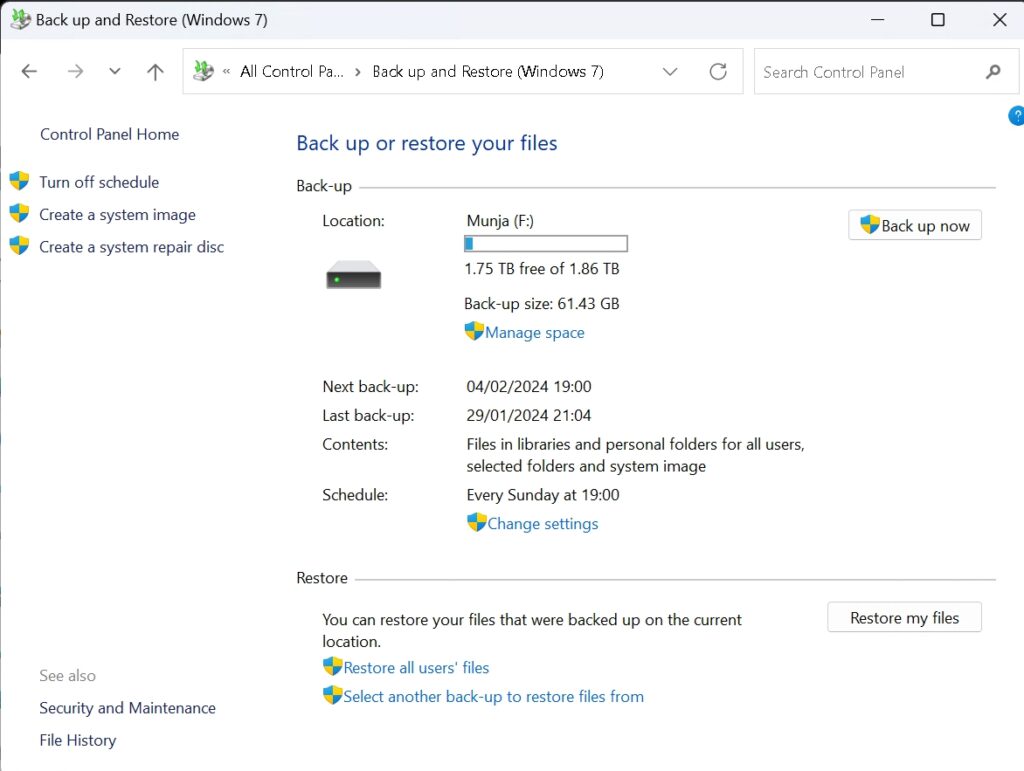
In search type in Control Panel – when Control Panel opens, from View by – select Large icons.
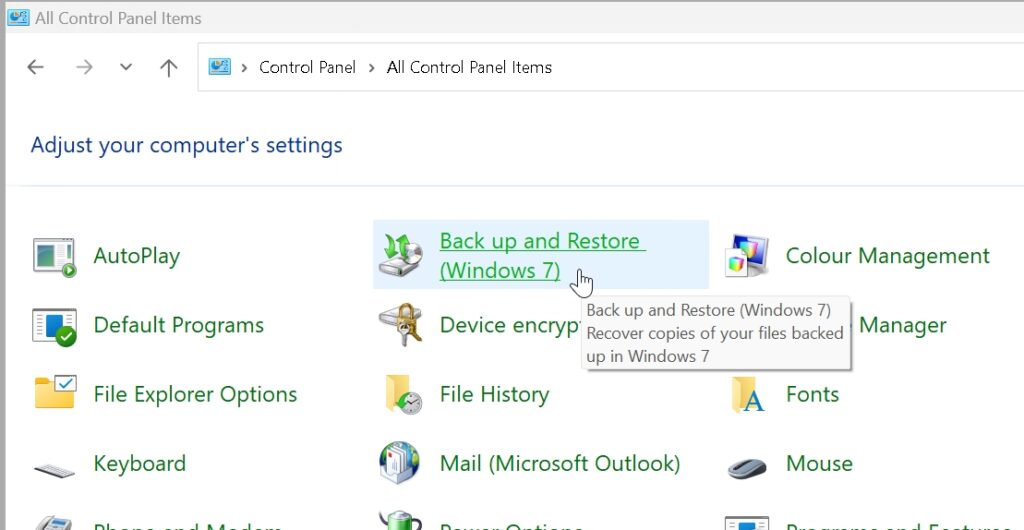
Now, select – Back up and Restore (Windows 7)
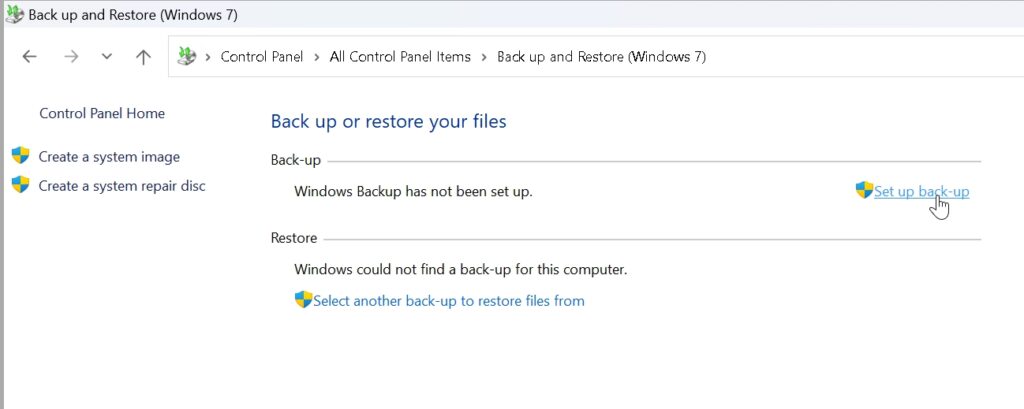
Select “Set up back-up”
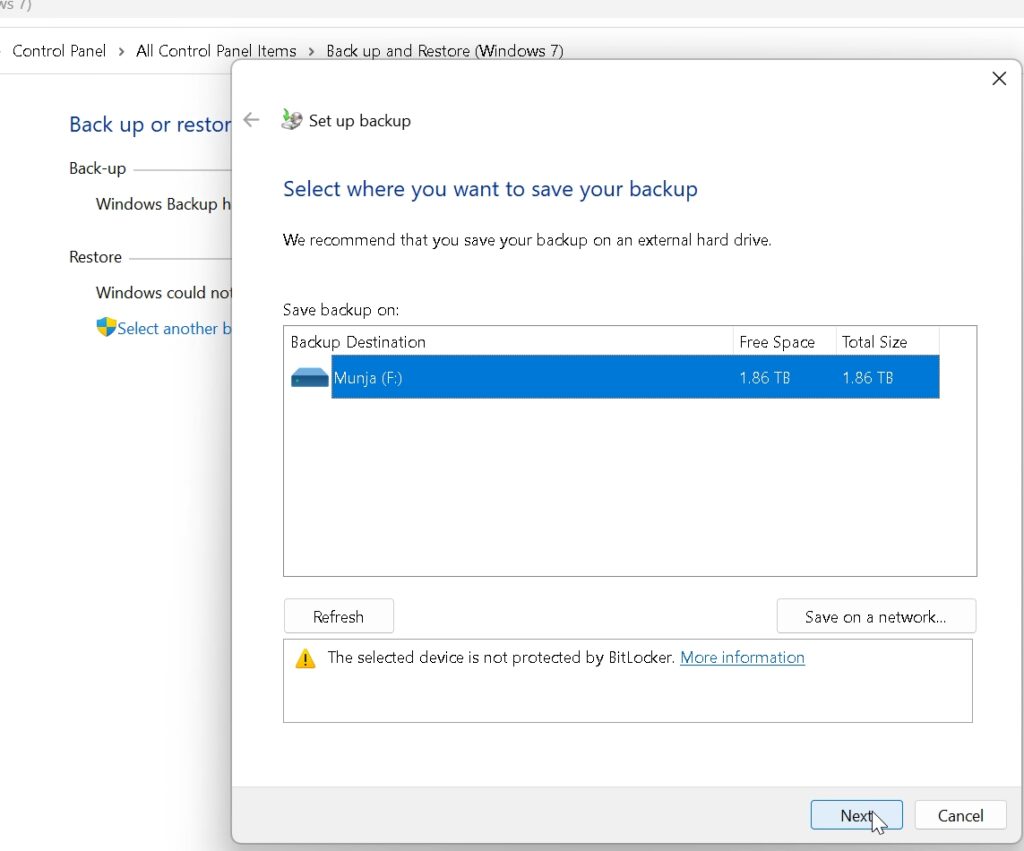
My USB drive is offered to me – so I will select it and press Next
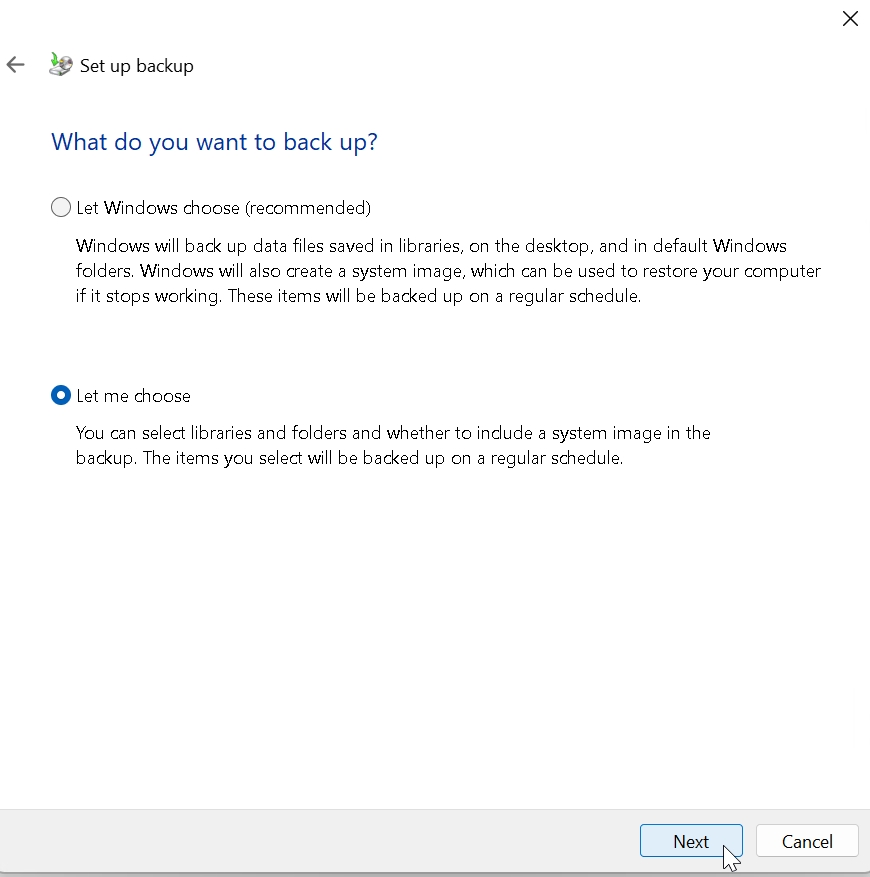
I will select Let me choose and press Next
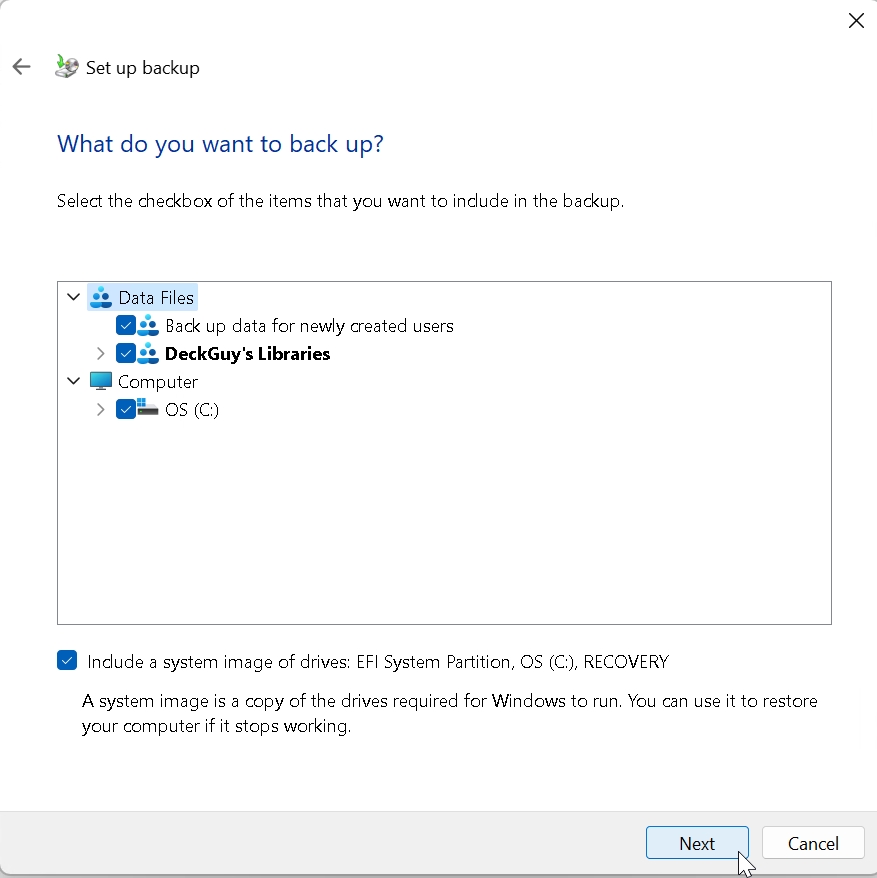
I will select absolutely everything and press Next
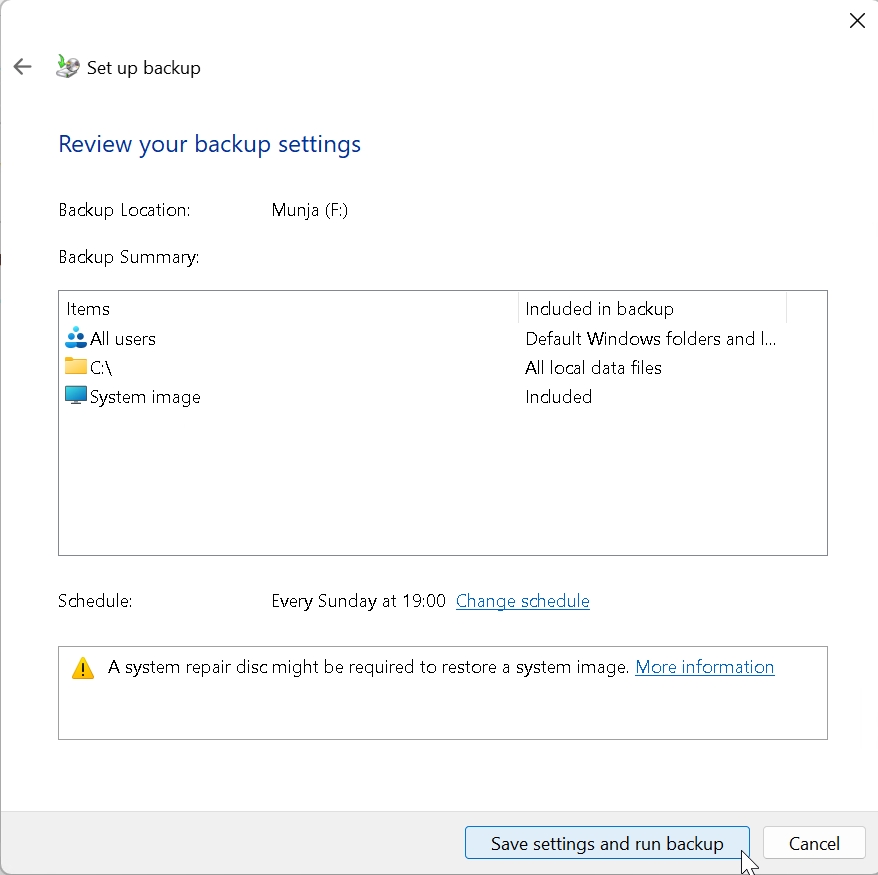
On the last screen you can see backup summary – what will be backed up. You can also set backup schedule (remember to have your external USB drive plugged in at the time you defined backup – I left Sunday at 19:00)
Save settings and run backup.
Backup is underway…
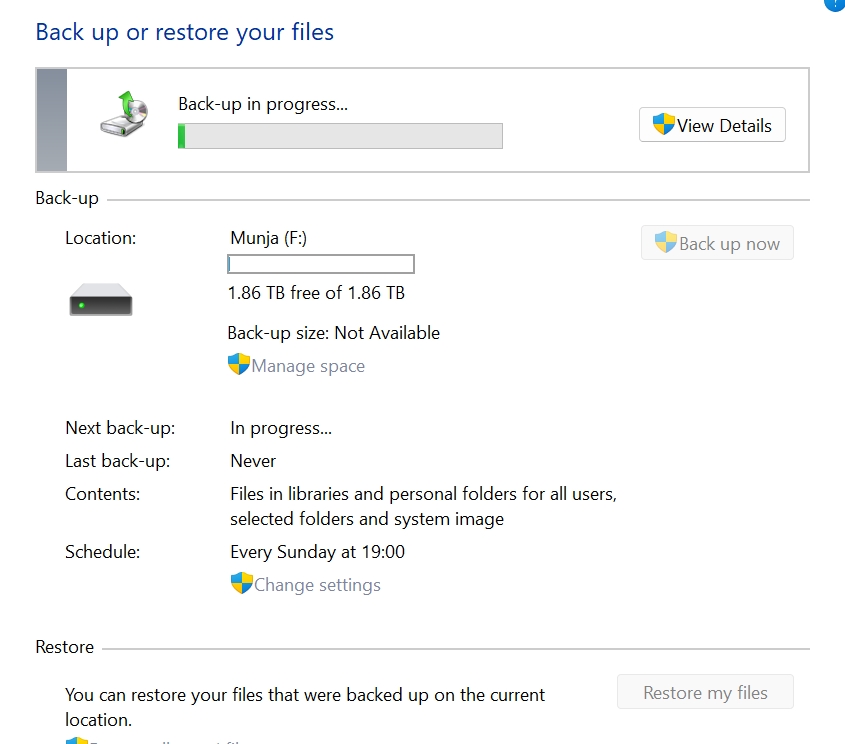
After some time backup will be done, in my case it took 20 minutes
And that is it. We have a backup of our system/games/files. However, good backup should also be checked, we will do it now.
Restore deleted file/folder from backup
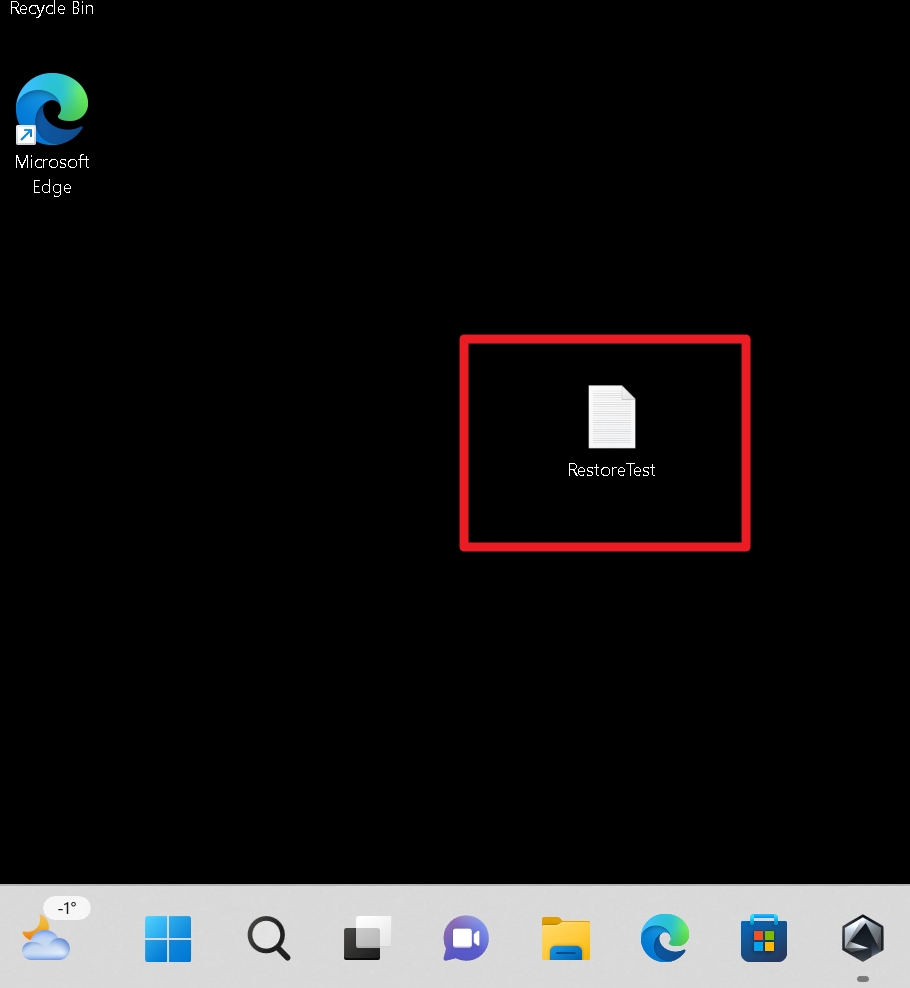
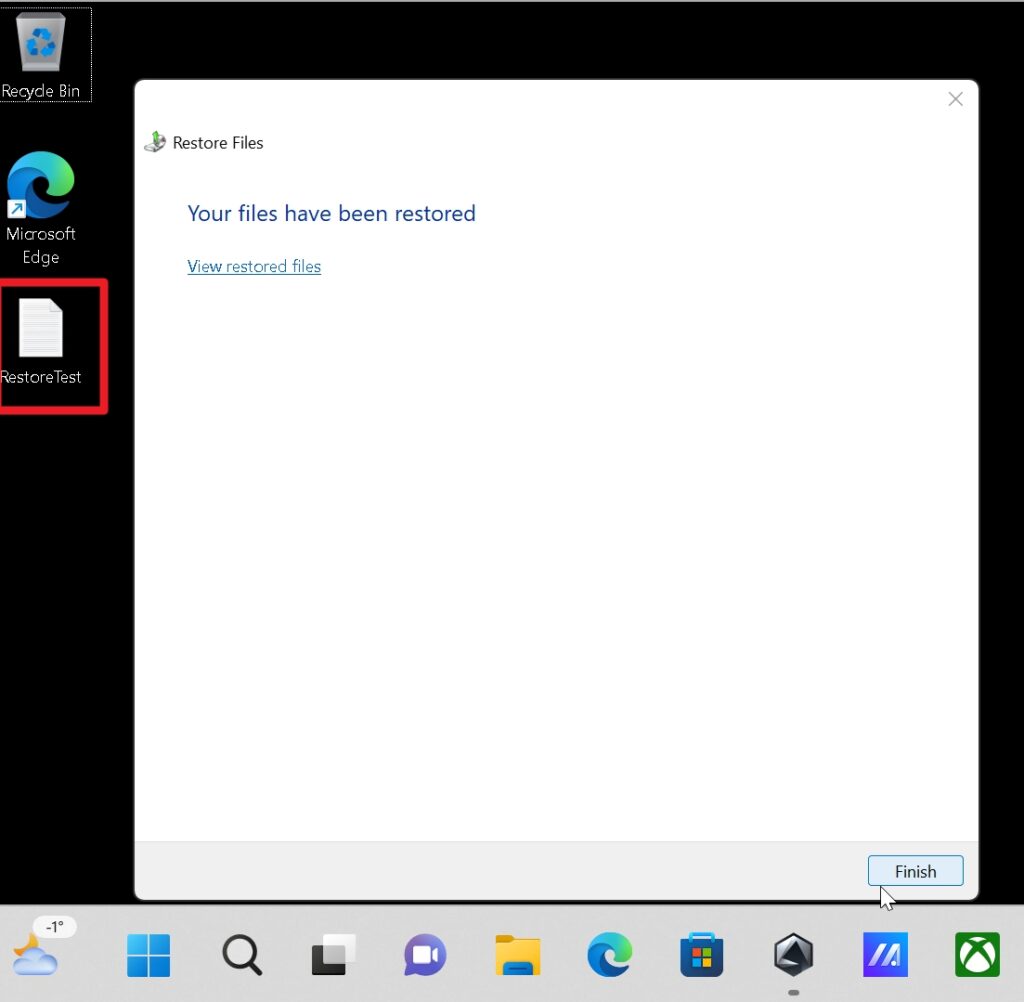
Before I started initial backup, I created simple file on my desktop named – RestoreTest.txt
I will delete the file, and then try to restore it
File is deleted
Before we start make sure that your external backup drive is connected to Asus Rog Ally. Ok, let’s head back to to Control Panel – select Back up and Restore (Windows 7) . Select Restore my files
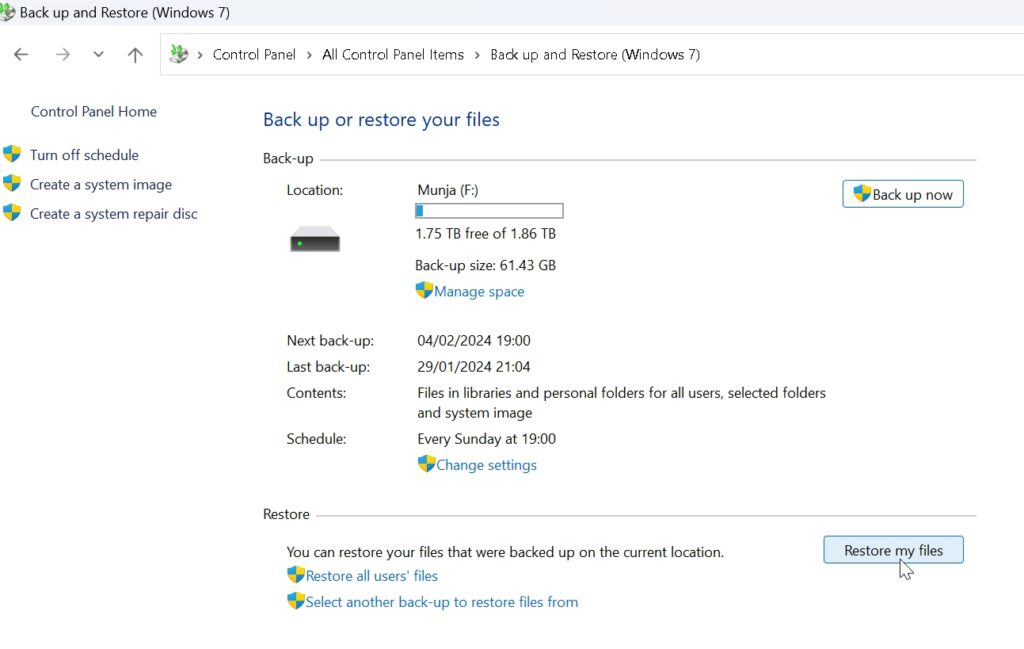
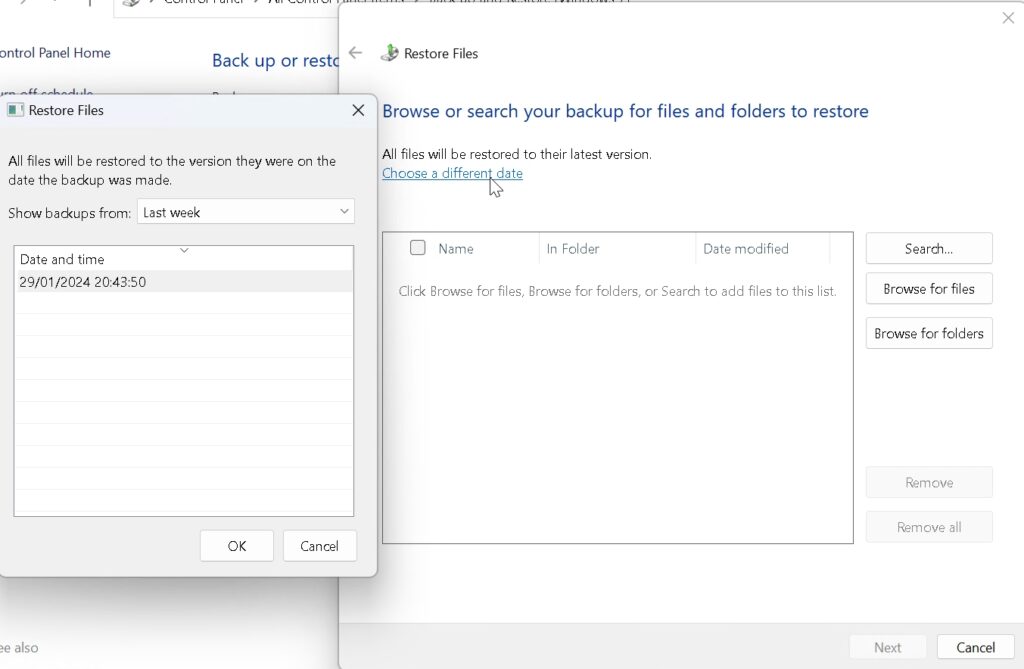
I will select “Choose a different date” and then select my last and only backup and press OK. This is a good practice if you have multiple dates of backups – you can select the date you want restore in here.
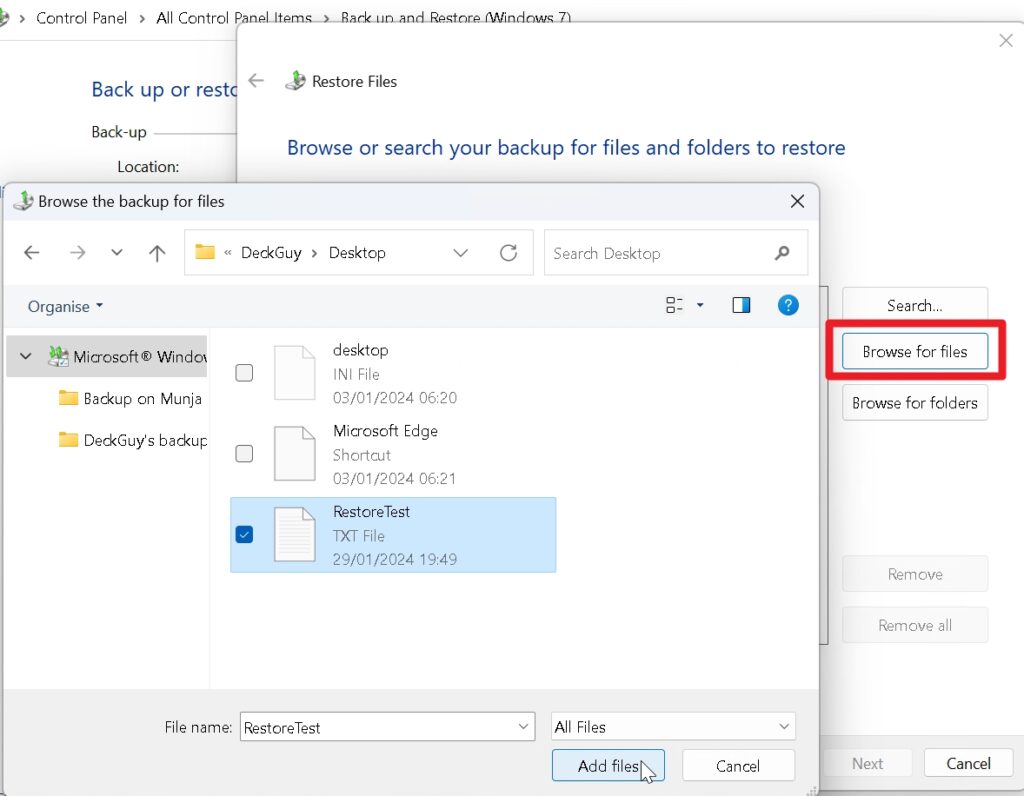
In the main window we will select “Browse for files”. I will navigate to the location of my RestoreTest file in the backup and select Add files at the bottom of the window.
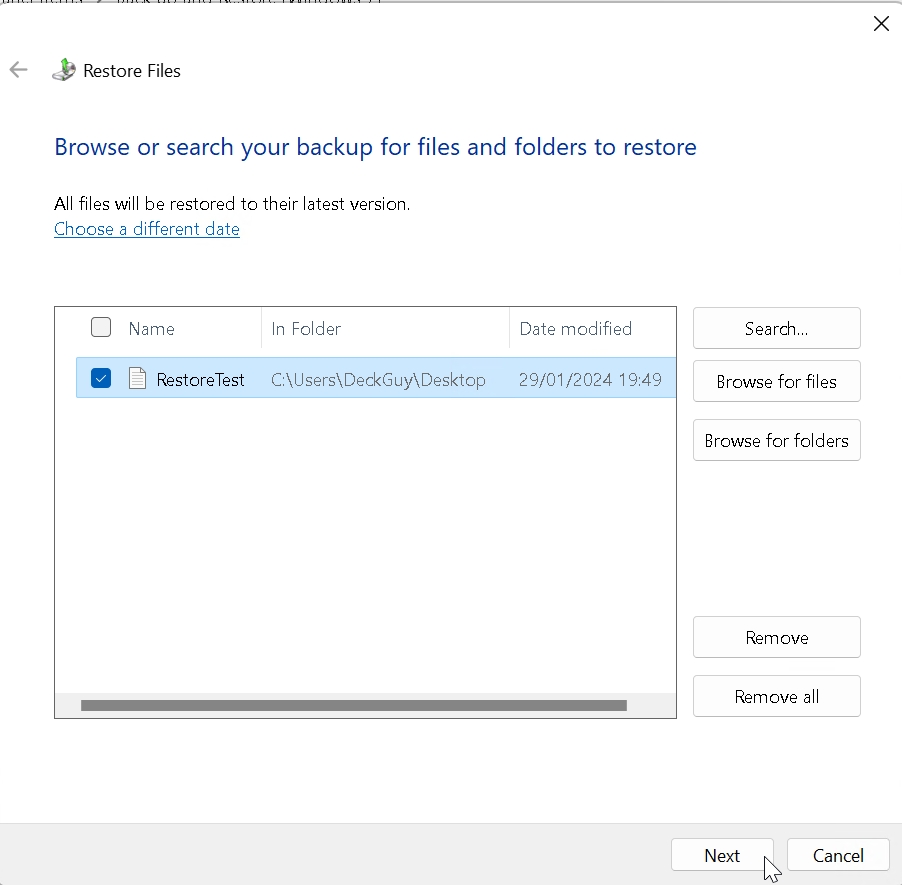
I will now select file I added because I want to restore it and press Next
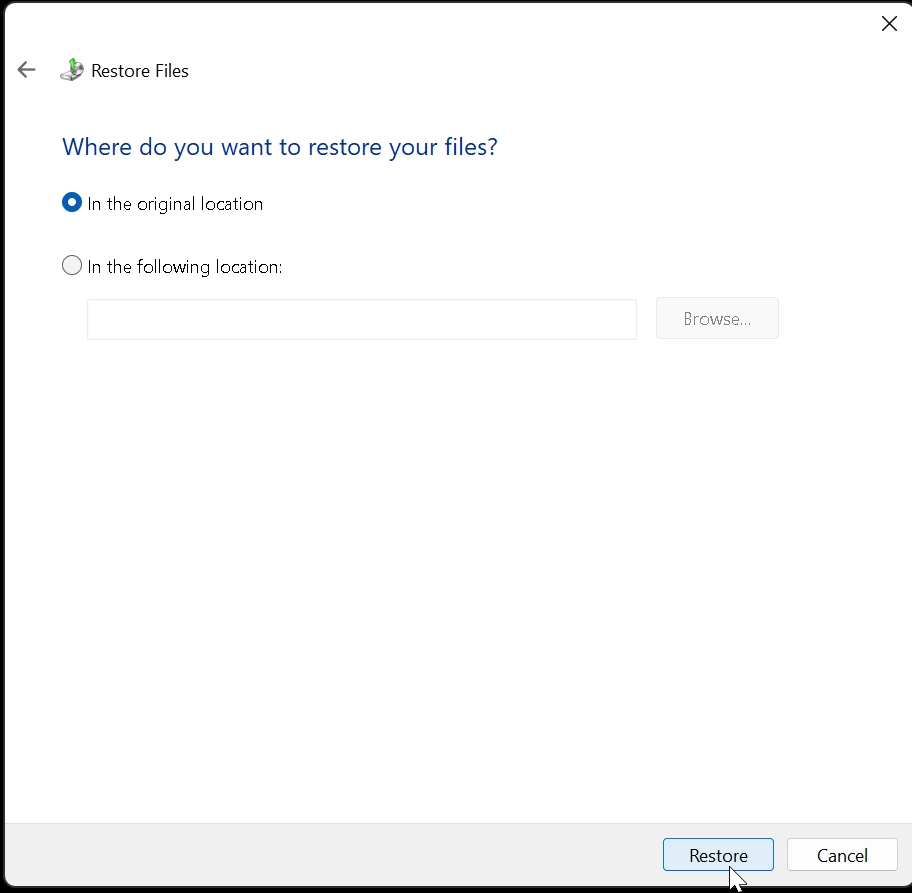
I want to restore to original location. Restore
Restore is done, and I can see RestoreTest file on the desktop again. Great, our backup works!
Restoring entire disk
If for some reason you lost your disk, or have a new larger disk you wish to restore to your Asus Rog Ally, here is how you will do it with the backup we done earlier. You need FULL backup, the one like we done here at the beginning – if you haven’t selected absolutely all to backup – this type of restore won’t work without FULL backup
You will need USB stick with Windows 11 installation – I described how to create Windows 11 installation with Media Creation tool earlier.
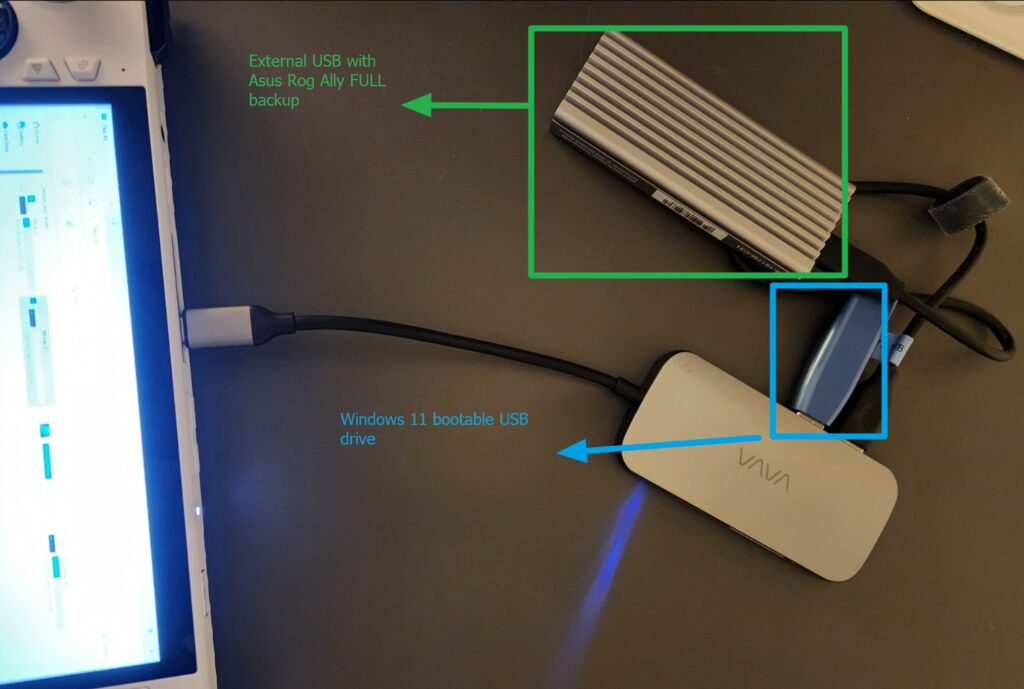
You will also need external USB drive with your Asus Rog Ally backup.
Both USB stick and external USB drive have to be attached to the Asus Rog Ally, so you will need some kind of USB hub (ideally one that is able to charge your Rog Ally).
Have your Asus Rog Ally battery on 100% would be ideal.
Optionally mouse and keyboard (wired or with dongle) can make your life easier.
This is my setup.
Ok, so, for this guide, I completely deleted my internal drive, and my Asus Rog Ally just ended up in BIOS after booting. It has nothing to boot to.
Attach USB hub with Windows 11 bootable USB and external USB with your backup of Asus Rog Ally.
Turn off your Asus Rog Ally – Press and hold VOL + button, and then just shortly press Power button, so that Ally powers up. Immediately release Power button after powering up, but keep on holding VOL+ button until you get boot menu.
Select you Windows 11 bootable usb and press A button, it should begin to boot Windows installer.
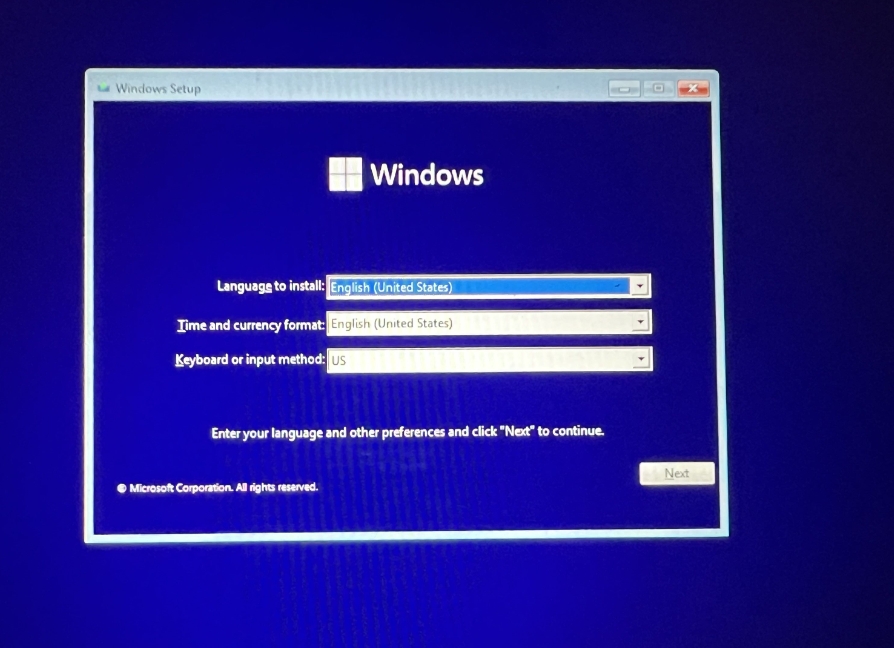
Select language (you probably will have only one choice.) Time and currency format and Keyboard or input method. Press Next
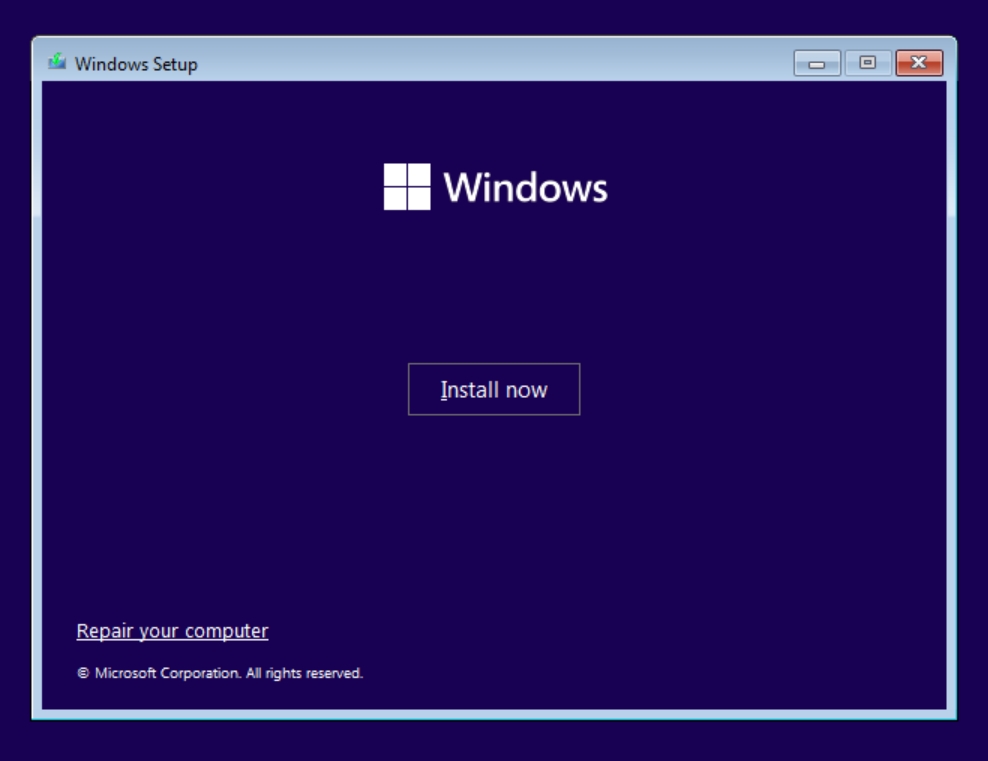
On Next screen select Repair your computer
OPTIONAL STEP – Only if you have unformatted disk drive inside your Asus Rog Ally follow next steps (If you have new disk drive that is not formatted, you will need to select Install now (unplug your backup drive from the system at this stage), click I accept – Next | Select Custom: Install Windows only | on Where do you want to install Windows screen select Drive which has unallocated space (in my case it was Drive0 with 476.9GB) – again, unplug your backup drive, so you don’t format it accidently! Click on New – leave size as it is – select Apply | OK. Click on red X, confirm to quit, and then reboot your Asus Rog Ally, reconnect backup drive, and select Repair your computer)
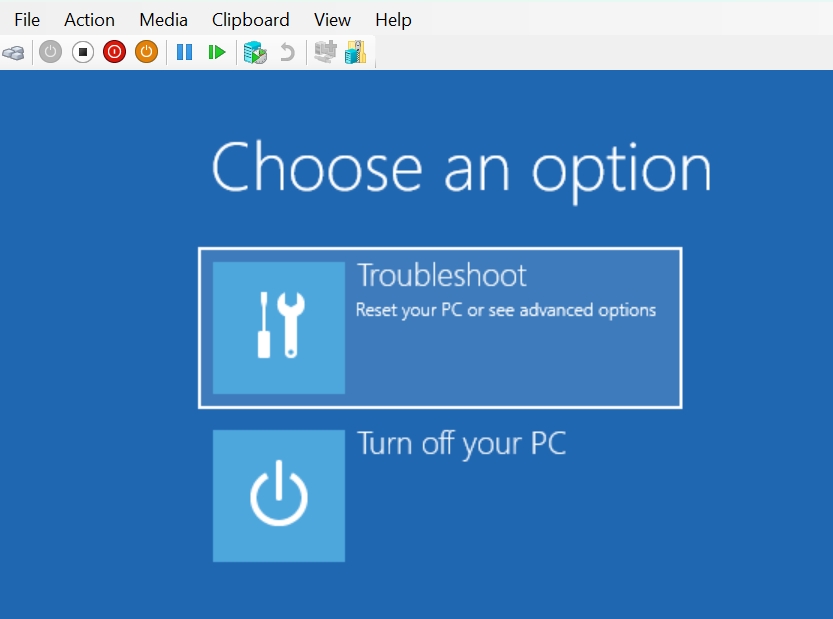
Select Troubleshoot
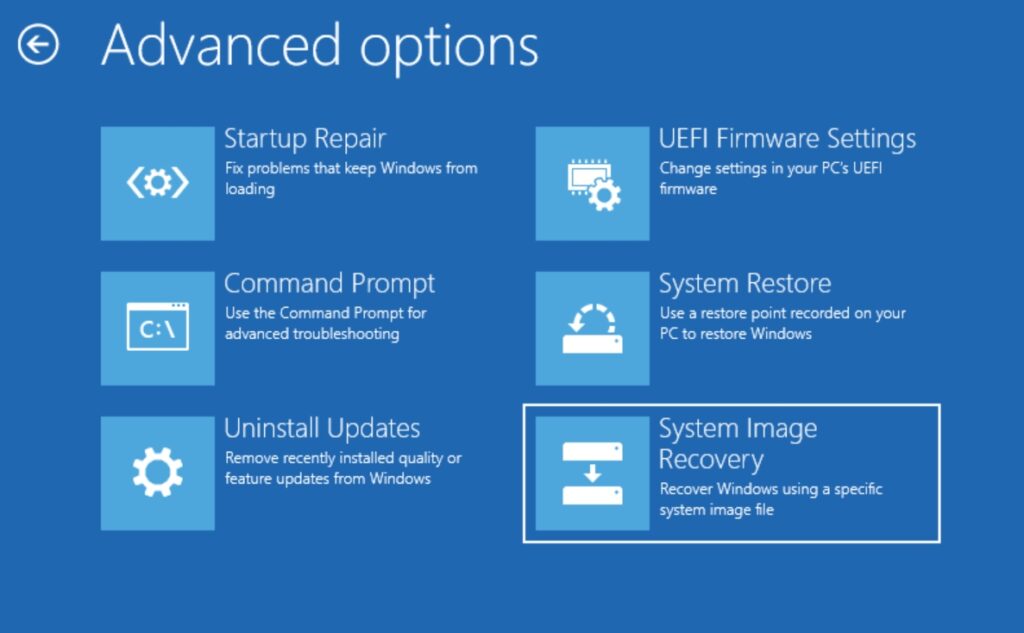
Select System Image Recovery
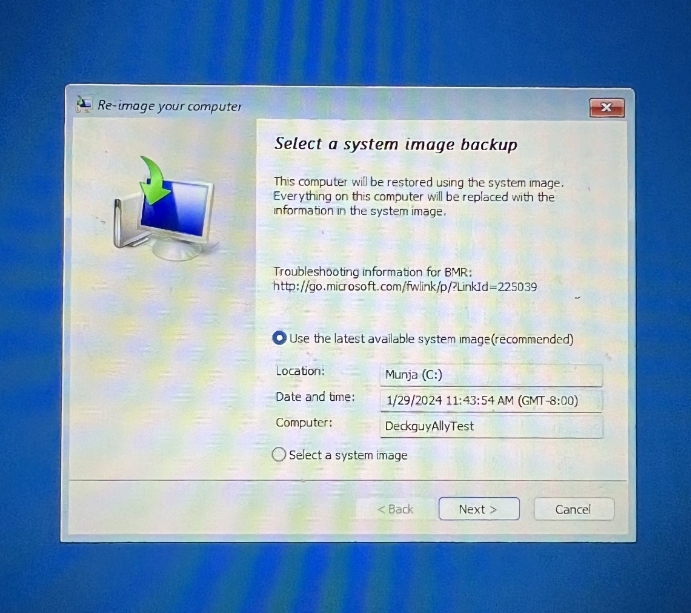
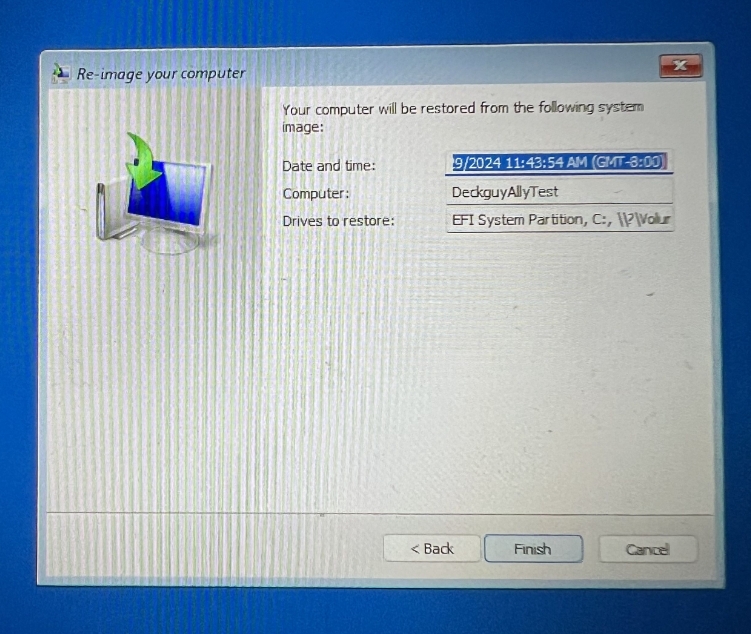
Now, your backup should be recognized, if you done everything with this guide. Just press Next if you agree with restore point.
We want everything as it was. Select Next
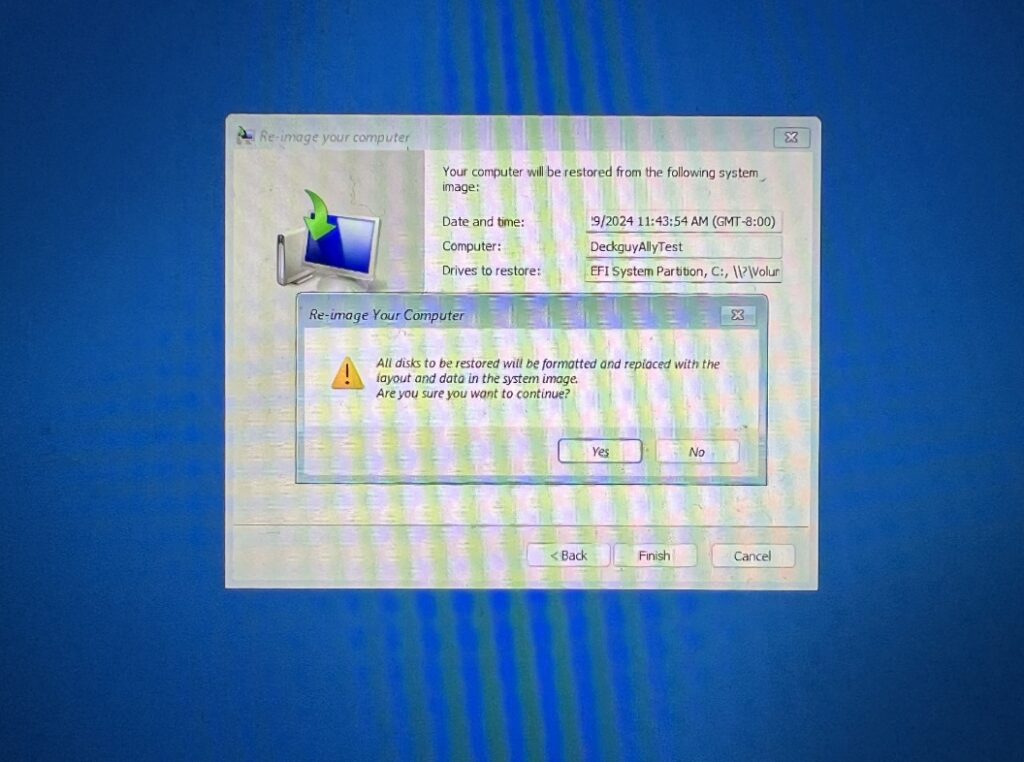
Select Finish and confirm with Yes (If you get The system image restore failed error, and if you have description of the error that starts with “No disk can be used for recovering the system disk… check few steps above, where I explain what to do when disk is not formatted)
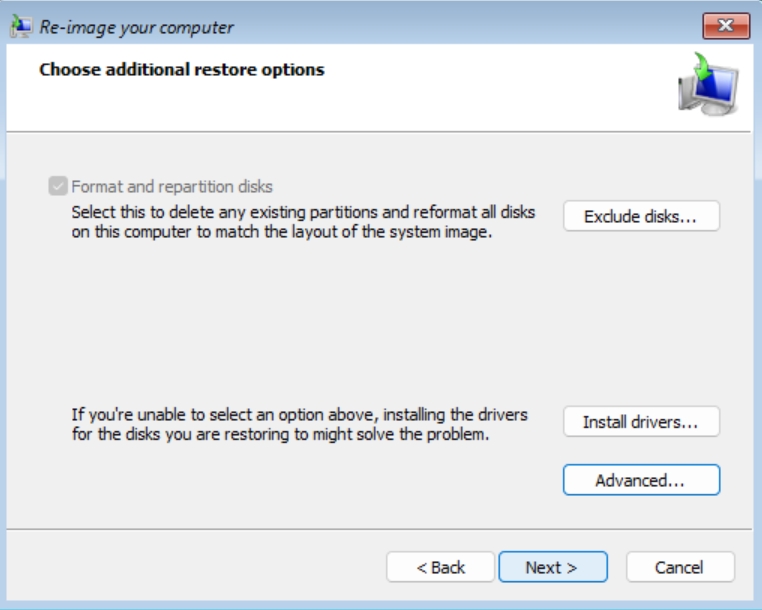
Make sure that disk you are bout to use does not have any important data on it, and select Yes
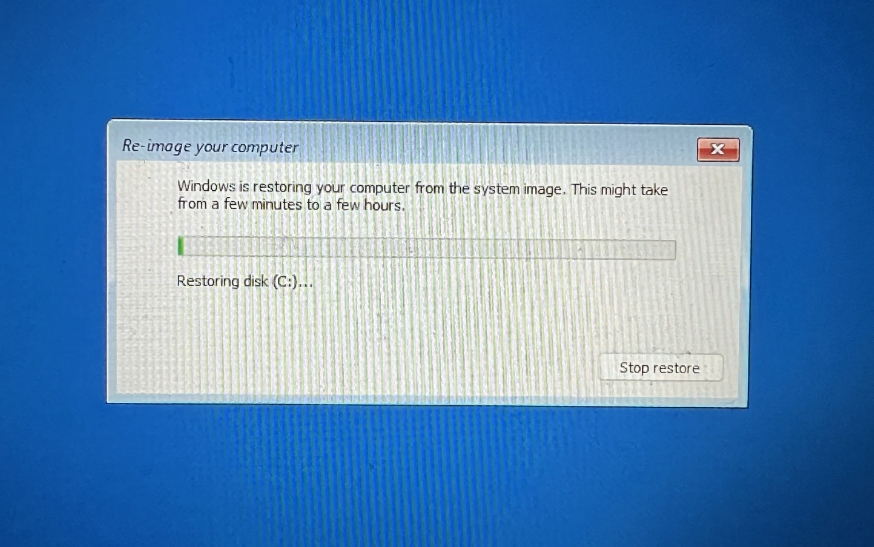
Restoration process is underway
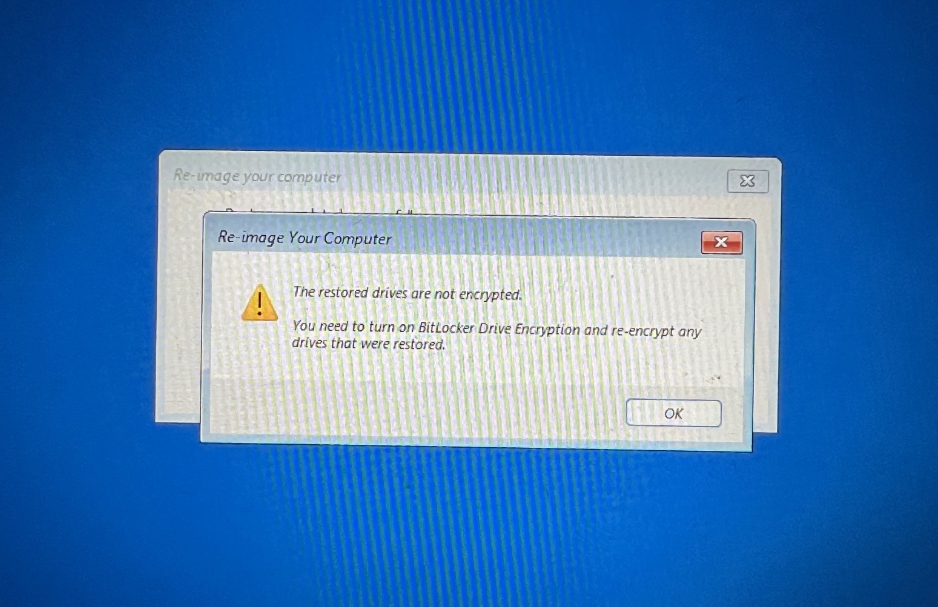
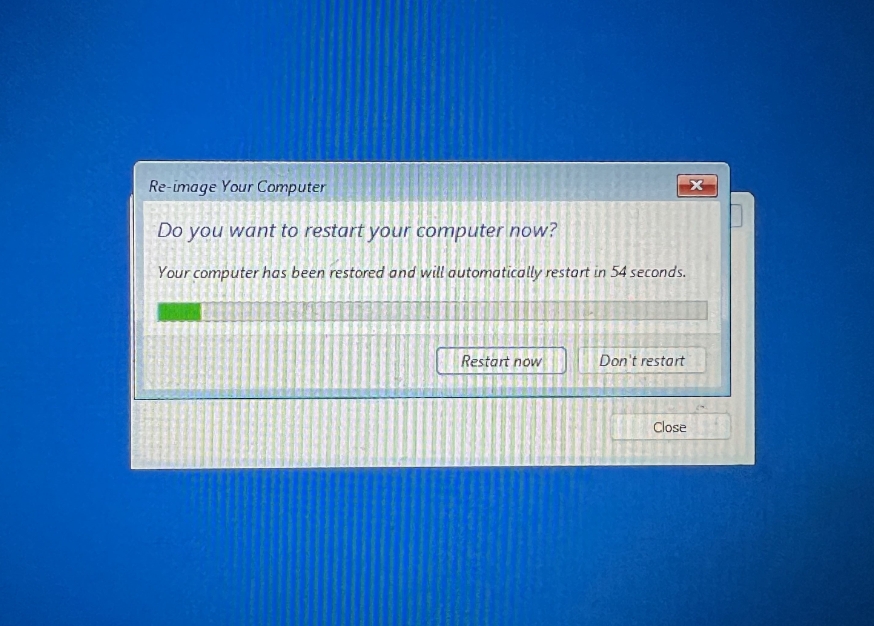
You will get a warning in the end, that restored drives are not encrypted. More on encryption on next occasion. Don’t be alarmed, everything is ok, press Next
Process is done, click on Restart now, when the screen turns black, disconnect your backup drive and Windows installation drive. Your console should bow boot back to Windows.
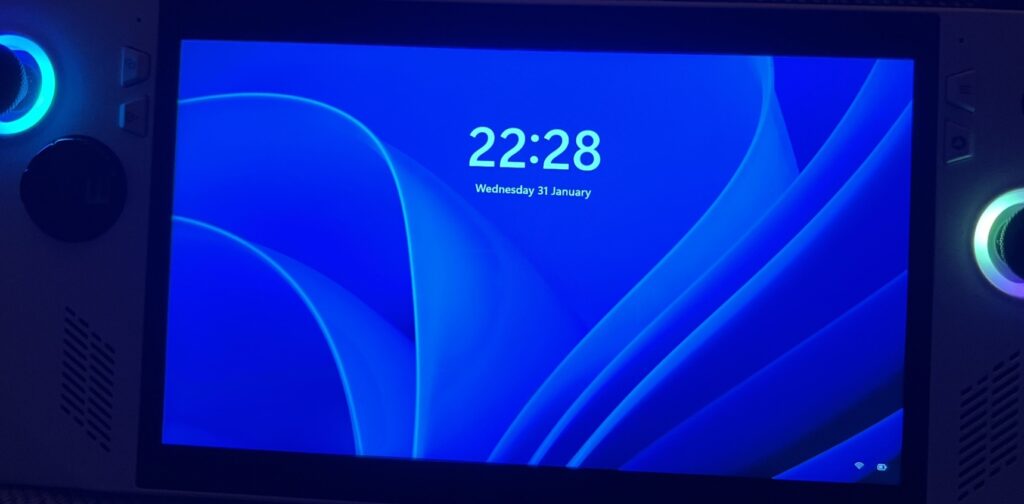
Windows booted normally, and all the data are in, great success!
That is it, we learned how to backup our Asus Rog Ally, how to restore lost files, or entire disk – great feature to use, and to preserve you data.